Monday, January 9, 2012

Challenge 2012 (Day 6) - 365 earrings in 365 days

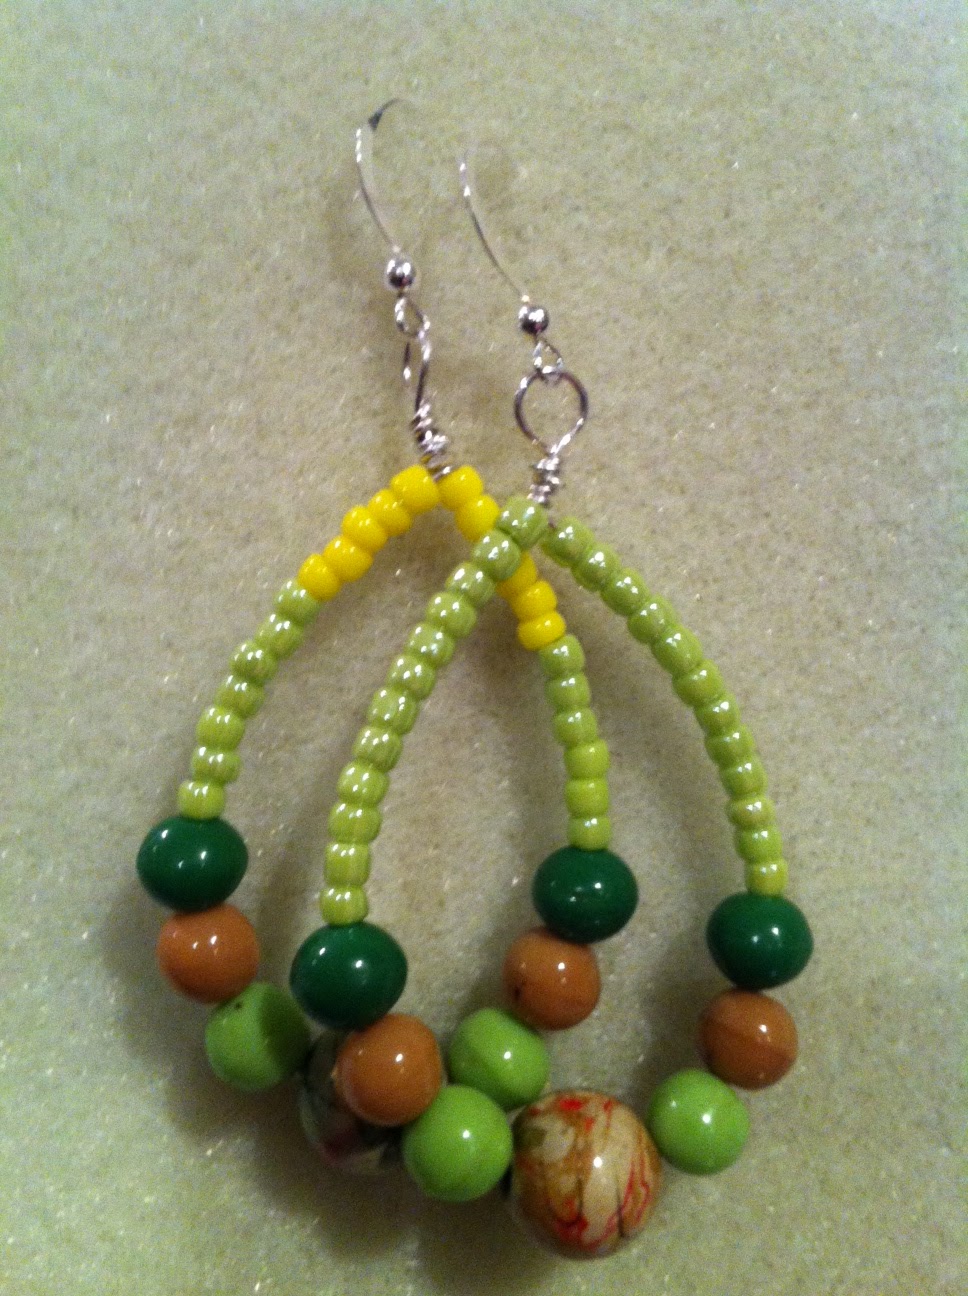
Today's earrings are pretty straightforward but, once again, pretty beads and, in this case, fancy wire make a difference!  I'd definitely wear this pair.

Before i get into the earrings themselves, i have a dilemma i'd like to put before you all.  WHAT am i going to do with 365 pairs of earrings???  Our daughter suggested we display them at the shop, hanging them above the top row of goods and going around and around the walls as needed.  Gettin dizzzy just thinking about that!  They aren't for sale just yet.  I'm thinking we might auction them off next January (in lots of 10 pair ha ha) and then donate the proceeds to......And that's where i'm stuck.  Any ideas?  Last year i participated in the Craft Challenge for the Wounded Warriors of the Special Forces.  Don't quite know what happened to that deal as the gal doing it got sidetracked by some other stuff but i liked the idea of supporting our soldiers and their families.  Anyways, leave a comment if you have a favorite charity.  We've got a few days before we have to have a decision, right?

OK.  The fancy wire i mentioned earlier is a Beadalon product called, you guessed it, fancy wire!  It is a copper core wire plated with non-tarnish silver.  And what it is is wire that has been twisted and then drawn to smooth out the bumpy edges.  It has a bit of a glint and adds a hint of elegance without bulk.  I used 22ga and found it to be very soft and easy to wrap.

Speaking of wraps, i like to use bailing pliers so that my loops are the same size throughout the project.  Bailing pliers have two different sized jaws and the jaws aren't tapered like a round nose.  Instead each jaw is the same diameter top to bottom so no matter where you place your wire, the loop will be the same size.  Ha ha!...come to think of it, i can use FOUR tools to make a wrapped loop:  bailing pliers to get the loop size, round nose to grip the loop while i finish forming it, flat nose to hold the loop while i wrap the neck, and cutters to cut the tail.  Hard way Harriet for sure!

So here is today's pair!  I used 6 green turquoise discs, two chips of quartz crystal, the fancy round wire, and stainless ear wires.  Because i was using wire and not headpins, i formed a tiny loop at the bottom of the crystal chip.  Again, this design is simple but effective.  And depending on how you arrange the beads, it'll look different every time.  Just 359 pairs left to do!!  I'm on it.  I'm so on it.

Sunday, January 8, 2012

Challenge 2012 (Day V) - 365 earrings in 365 days!

And the next entry in the seemingly never-ending earring saga (is this really just the fifth day?), is a study in spirals.  Working with wire is an extended learning process for  me; each time i try a wire technique, it seems like the first time.  I've made  spirals before.  Not thousands  of them, but a few.  Using a project from the book Complete Guide to Making Wire Jewelry (Art Jewelry Books by Kalmbach Books), i first had difficulty deciding which way the instructions meant for me to bend the wire.  Perpendicular, you say?  To what?  The 90-degree bend in the river?  The photos didn't help.  Maybe i was just overthinking  the process  but  it didn't get any easier with successive spirals.  Nevertheless, i pushed through the brain fog and created a pair of spiral-happy earrings.  AND i had a lot of help from my husband, who is also trying really hard to teach me to take decent photos.

Supplies:
22ga colored copper wire
black ear wires
round nose pliers
chain nose pliers
cutters
ruler

Cut pieces of wire ranging in length from 1.5" to 2" or even 2.5"
Make a simple loop at one end of each piece.  Go here for the how to:

For short dangles, measure about 1/8" from the bottom of the loop.
For longer dangles, measure about 1/2" from the bottom of the loop.
Listen hard at this point:  "Grip the wire with the tip of your chainnose pliers, and bend the wire 90 degrees.  This bend will make the stem of the wire perpendicular to the loop."

Got that?  Great!  You'll do it several more times.

Now make a spiral up to the 90 degree bend.  Go here for the how to:
www.artbeads.com/wire-spiral.htm

When you have all the spirals you can stand to make which for me was about six per earring, open a fairly large jump ring and slide the dangles on in a pleasing order.

Attach an ear wire, close the jump ring and admire your spirally handiwork!

And here's Day Five!   Ooooooooooooo!  Ahhhhhhhhhhhhhh!

Only 360 pairs of earrings to go!

By the way, scroll down to leave a comment and be sure to "follow"  this blog!


Saturday, January 7, 2012

Challenge 2012 (Day F-f-f-f-four) - 365 earrings in 365 days!

Thank goodness for beautiful beads because they make a basic design look like something special.

Day four combines nephrite jade briolettes with Swarovski crystals.  Nephrite jade is the jade that is found from British Columbia down to New Zealand and probably other places.  Nephrite jade is an important component in the art of the native peoples of the Pacific Northwest.  Here's a photo of my little jade inukshuk which, if you remember, was the symbol of the 2010 Winter Olympics held in British Columbia.


From http://www.inukshukgallery.com/ - The mysterious stone figures known as inuksuit can be found throughout the circumpolar world. Inukshuk, the singular of inuksuit, means "in the likeness of a human" in the Inuit language. They are monuments made of unworked stones that are used by the Inuit for communication and survival. The traditional meaning of the inukshuk is "Someone was here" or "You are on the right path."

"You are on the right path."  I like that!

OK.  Back to the earrings of the day.  Briolettes beads are drilled across their tops and require a slightly different wrapped loop technique from beads drilled through their little beady bodies.  Briolettes, especially gemstone briolettes, often have narrow drill holes and that can make the tip of the bead fragile so when you are sizing wire that will go through the drill hole, don't force the wire.  How do i know this?  Guess.

How to do the briolette wrap:
 http://jewelrymaking.about.com/od/wiretechniquesinfo/ss/011007.htm

For the second component i put three 4mm Swarovski crystals on a piece of wire and made a double wrapped loop, attaching one end to the briolette.  Isn't the yellow crystal a nice complementary color to the green jade?  Thanks for the suggestion, Donna!

Then, because once again i forgot to bring home what i needed, i had to fabricate the ear wires.  sigh.  What was that about "You are on the right path"?

Several of you are actually playing along with Challenge 2012 and, so far, we are all laughing.   Remember, there are no demands and no demerits.  Let's just have some beady fun!!!

 Day four presents...


Friday, January 6, 2012

Challenge 2012 ( Day Threeeeeeeee) - 365 earrings in 365 days!!

This pair reeks of pushed-to-the-wall but the basic design is solid.  The shape looks good on most everybody and it's easy to make each pair unique.  My original design for today didn't come together because i didn't check the size of the hole in the jade teardrops against the gauge wire i brought home with me tonight.  grr.  Doesn't fit. My search through my personal stash yielded nothing that appealed.  uh oh....running out time for day three...

So this is what i came up with in the end.  The main beads are cool.  They are from my mom's collection.  The seed beads would have worked with more thought but i completed the first earring and then discovered i didn't have enough of the green bead.  grr.  sigh.  Not starting over though, just beading through.  And this pair is #3.

And blessedly simple.

BEGIN by assuring you have sufficient beads to complete the design.
Fill a length of 22ga precious or plated round wire with beads.
Select enough beads to fill the wire to a medium sized tear drop shape.
Wrap one end of the wire around the other to set the shape and size of the drop.
One or two complete wraps is enough.  Cut off any tail.
Use chain nose pliers to bend the second wire to 90 degrees then complete a wrapped loop with it.
Attach an ear wire.
Repeat for second earring.

Can you spot the design flaw? 

So until i get different wire, that first design idea is on hold..  But it is going to be sweet! 

Pair #4 coming up!

Thursday, January 5, 2012

Challenge 2012 (and beyond!) - 365 pairs of earrings in 365 days!

Alrighty then!  The second pair of earrings in our Challenge 2012 is good to go!

These earrings are based on a design that i saw in a magazine last year and it caught my eye from the get go so what better time to give it a try than today!

And, even more fun, this was my first completed - although tiny - attempt at metal work!! 
 Ima gonna do MORE!!!!!

Supply list: 
(2) 1" pieces of 14gauge square sterling wire
(6) 6-7mm coral discs
6" piece of 22gauge Artist Wire in non-tarnish silver
earwires or posts

hammer, steel block, rubber block, hole punch, round nose pliers, chain nose pliers, cutters, file, marker
Hammer the 1" pieces of sterling silver wire until flat.  I laid the steel block on the rubber block to deaden the noise a bit.  The silver will flatten out and lengthen somewhat.  I used the chain nose pliers to hold one end of the silver so i could hammer the middle.  I did this after i hit my thumb not once but three times.  OK. Maybe i need to use a tool for this.  D'oh.  But i'll tell you what.  Hammering metal is a BLAST!!! 

4x4 steel block by Euro Tool
Available at Bead Boutique
 
When the piece of silver was as flat as i liked, i used the file to smooth the ends a bit. (Full disclosure:  i actually started with a 1.5" piece of wire but that made the flattened metal too long for my taste so i had to shorten it.)

Then, i used this nifty little hole punch tool to punch a hole in one end of the flattened metal.  I marked the spot where i wanted the hole but still ended up with one of the holes a leetle too far off center, almost off the metal.  Luckily still usable though. 
hole punch by Euro Tool
Available at Bead Boutique

The final thing was to stack the coral discs on a length of the 22-gauge wire and do a couple of of wrapped loops to attach the coral beads to the metal and then to the earwire.  Pair #2 is done!!  Only 363 left to do! Tomorrow's pair will be a LOT simpler design than this but, i have to say, today's earrings made me smile!


Wednesday, January 4, 2012

365 pairs of earrings in 365 days


My intent was to start this personal challenge on January 1st as that would have been a neat and tidy way to manage these 365 pairs of earrings, no?  Pair one on 1/1 and pair 365  366 on 12/31.  Alas.  Life is rarely tidy enough to stay contained in those itty bitty rigid calendar squares and so, after spending the first couple, three days of 2012 in pain and then recovering from that pain, i'm starting today.  Yay!  Besides, now i just have to come up with 365 pairs.  Hey.  Small blessings abound.  You just have to be ready for 'em!

Rules of the game.  Ummm......let's not have any rules.  Instead, here are a couple of guidelines that i plan to follow for this challenge.
1.  One pair of earrings per day.  No fair stockpiling. 

I think that's it.  Sweet!

Play along if you'd like!  Start whenever.  Stop whenever.  It'll be fun!  And you'll get at least one new pair of earrings from this silliness.  Also, feel very free to make the designs i post here.  I'll include a list of supplies and some basic instructions. 

Here's pair #1.   Only 364 more to do!

Garnet is the birthstone for January so this was a no-brainer.  For days, though, i thought i had some beautifully  faceted garnet briolettes and i had this elegant design all laid out and then after the pain, reality kicked in and these were the garnets i had on hand.  So i used 'em.


Supplies:
 6 garnet beads approximately 2x3mm
 3 or 4 black headpins 2.5"/ 24 gauge
 2 black earwires

round nose pliers
flat nose or chain nose pliers
cutters 

Technique:  closed wrapped loops
                                                              
How fun!!!!  Now if i can just get this blogging business down to a manageable time, i'll be doing swell!  See you tomorrow!

Wednesday, March 30, 2011

Special Forces Warrior Foundation Challenge - week 2

wow!  There is a LOT about the kit components that i don't get.  The mix of colors - wait! the pinks don't match!  The nothing-but-crystal and pearl beads - what no stones? too girly! And they are all so different that i am stymied by how to combine them. 
My latest favorite technique is knotting so, naturally, i tried that.  mmmm...has potential but it doesn't excite me.  Good fallback technique if all else fails.  Simple stringing....oh wait! there's more i don't like!  I can't get a pleasing symmetrical pattern with these beads.  Melissa reminds me that it's a CHALLENGE.  Well, i'm feeling challenged alright!  And have you seen the company i'm keeping?  Yikes!  They're scary good!  Real beaders with vast repetoires of technique!  I want my contribution to bring in lots of auction dollars for the Craft Warrior Foundation, too!
Then inspiration strikes!  Not too long ago, i dangled a bunch of oddball glass beads from six inches of chain and added enough of a length of multi-strand seed beads to make a necklace.  Customers loved it!  That's what i'll do!  And it'll be great!  What do you think?